Who doesn’t love a good peek behind the scenes or a before and after to see how the final shot was created?
Being able to see how images I admire were put together enables me to learn and try new techniques. On top of this, seeing that some of the most amazing images can be created from very simple and inexpensive setups shows that you don’t need a big budget, a studio, a professional model or specific props or equipment to create something beautiful. It makes art feel more accessible to everyone.
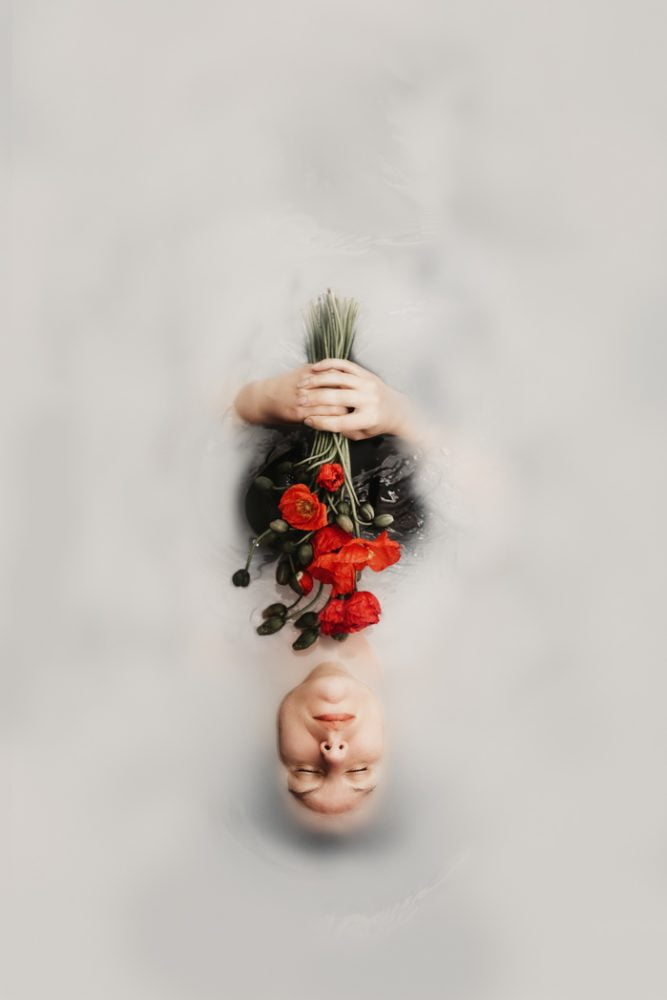
Shooting and Editing “The Anatomy of Sleep”
I thought this image would be a good one to break down as it was a very primitive setup, cost $10 in props to make and came a long way from the original shot to the finished image.
The Props
- 1 litre of coconut milk – $2
- A bunch of poppies from the supermarket – $8. I also had these flowers in a vase on my mantle for a week after this shoot and then used them again in another image once they had started dying so they were very good value.
- A black bedsheet
- A bath
The Setup
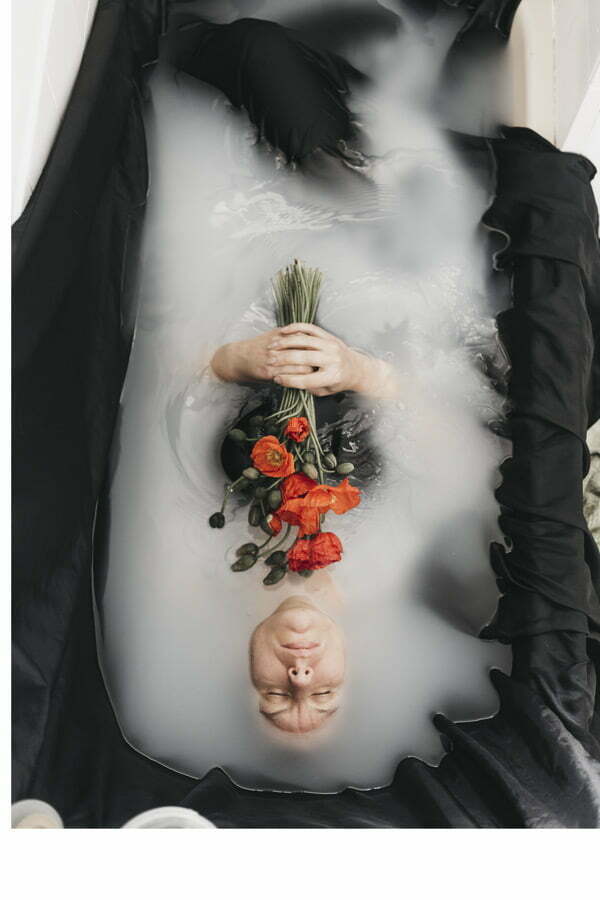
I shot this image in the bathtub in my house. My camera was on a tripod which I wedged over the top of the shower so I could point the lens down over the bath.
I filled the bath with water and added the litre of coconut milk. I used a large black bedsheet sunk into the water because my bath is a light cream colour and I wanted the white of the milky water to have something to contrast against.
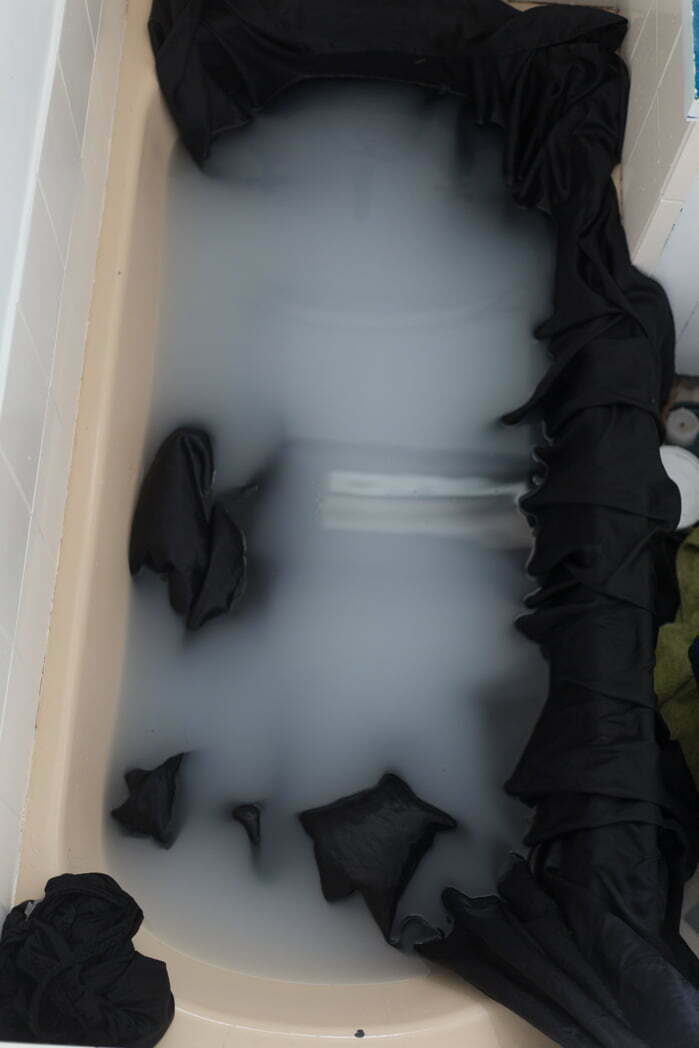
The setup looked something like this – I did have the side of the sheet taped to the wall but it came unstuck partway through shooting. I had placed heavy items from around my bathroom on the top of the sheet to hold it in place – not recommended as I ended up pulling a candle in a jar into the bath towards the end of the shoot, leaving me sitting in milky water with broken glass. Fortunately, by this stage I had the shots I needed!
Shooting
I shot about 12 images in total, experimenting with the positioning of my hands and how far I sunk under the water. I had my camera tethered to my laptop which was sitting to the side of the bath so I could see the shots I was taking and make small adjustments to the pose without having to get out of the water.
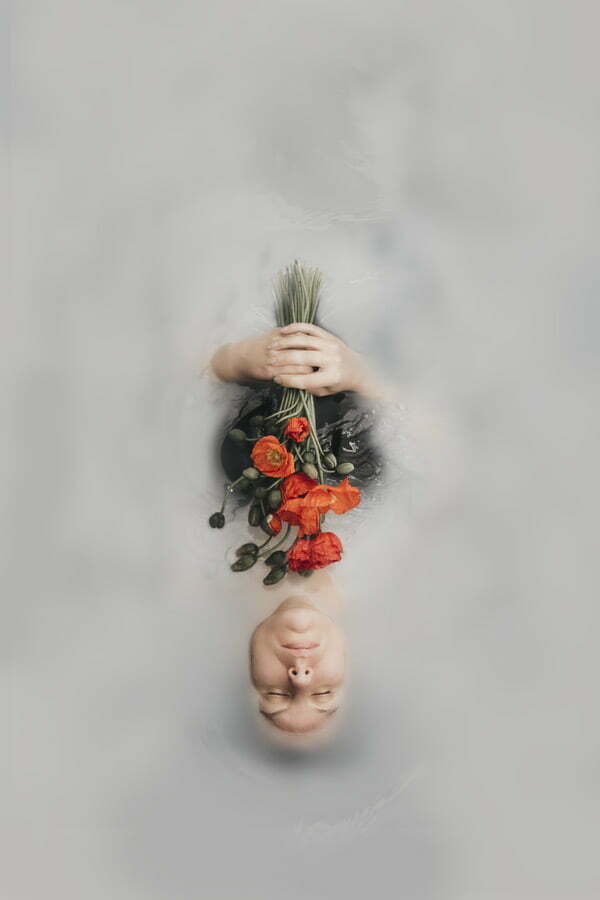
Then I loaded all the images to Lightroom and selected the main shot to build the image around. I chose the shot that had the main parts of the pose correct, knowing that I could composite in small details from other shots.
I apply basic editing in Lightroom – I have a preset that I use on most images which was a free one I downloaded and then adjusted to my own liking. It tweaks the tones and contrast and provides a good base to build on.
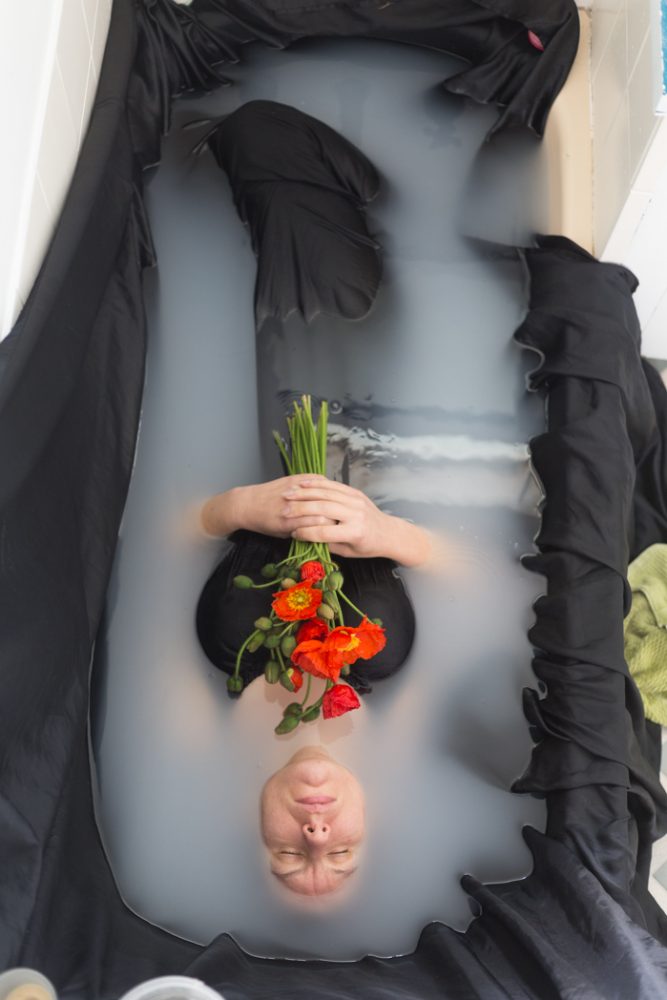
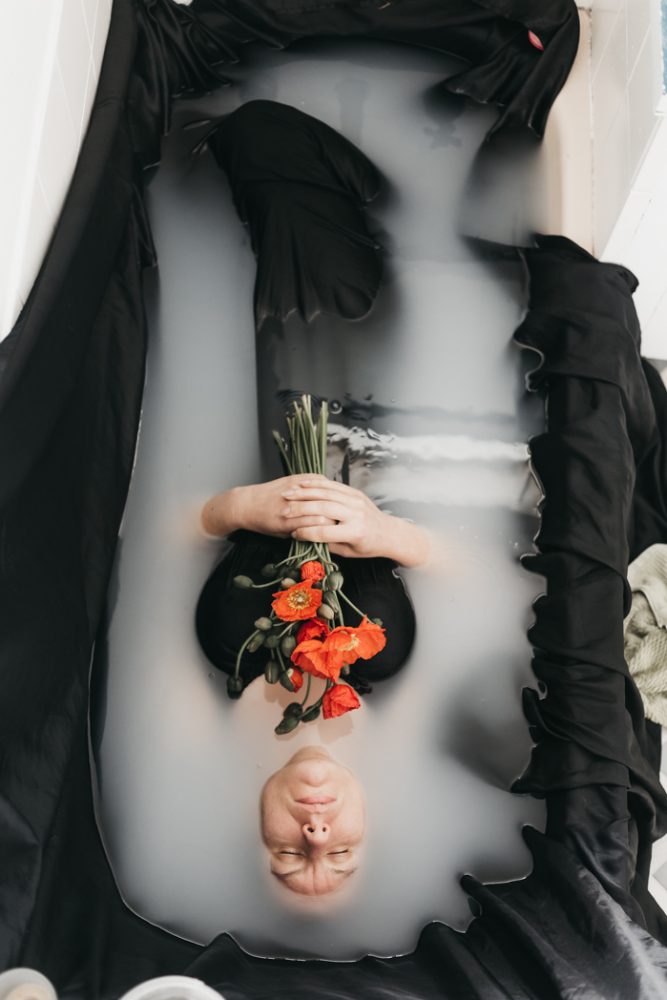
This is the main shot I chose to work with straight out of camera and then again with basic lightroom edits applied to it.
Editing in Photoshop
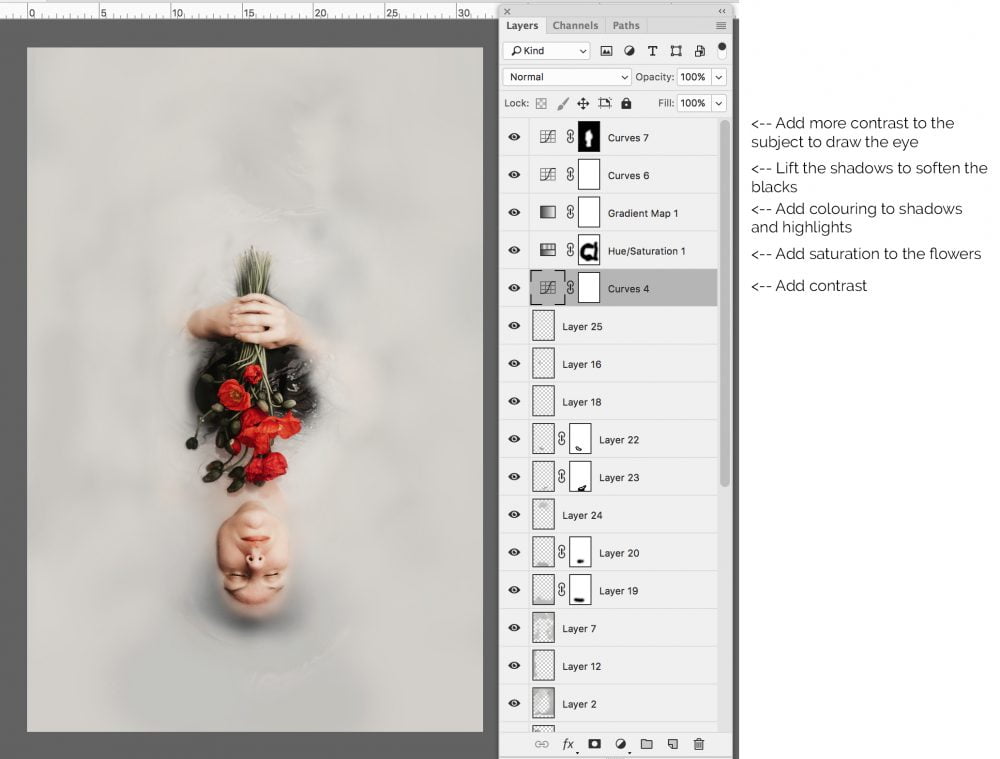
From here I took the image into photoshop. I also opened a few other shots with the same basic lightroom adjustments applied because I knew I wanted to change some details in the hands and flowers, as well as removing reflections from the window. Step one is always compositing – I want to get the complete structure of the image in place before applying any overall edits. In this step, I also did some retouching on the face because I wanted the skin to be smooth and soft to give a calm and dreamy feeling to the image.
Once the compositing was done, I needed to take care of the background – obviously, I didn’t want to leave the sides of the bath and towels on the floor in the shot. Because the water was cloudy and soft with no distinctive pattern or features I could easily use a combination of painting and cloning to fill the space. First I sampled colours from different parts of the water and painted with a soft brush on a new layer to cover everything I didn’t want to show. Then on another layer, I used the clone stamp tool to clone some water ripples and texture over the top, blending into the painted layer to match the rest of the image. I continued adding layers and painting, blending and cloning until I was happy with the result. In total I ended up with about 12 layers of background – I like to keep each new round of adjustments on a new layer so I can tweak them individually.
Adding Colours and Contrast
Once all the elements of the image are in place I add a number of adjustment layers to change the colour and contrast and to refine the image into a final piece. Again with this, I add each new adjustment as a separate layer so I can have full control over each of them.
I ended up with 5 adjustment layers, shown below. I use mostly curves layers for adjustments, with Hue/Saturation for tweaking specific colours (in this case making the flowers redder and more vibrant). I also like to use a Gradient Map for colour toning. Set to a Soft Light blend mode it allows me to add different colours to the shadows, mid tones and highlights of the image.
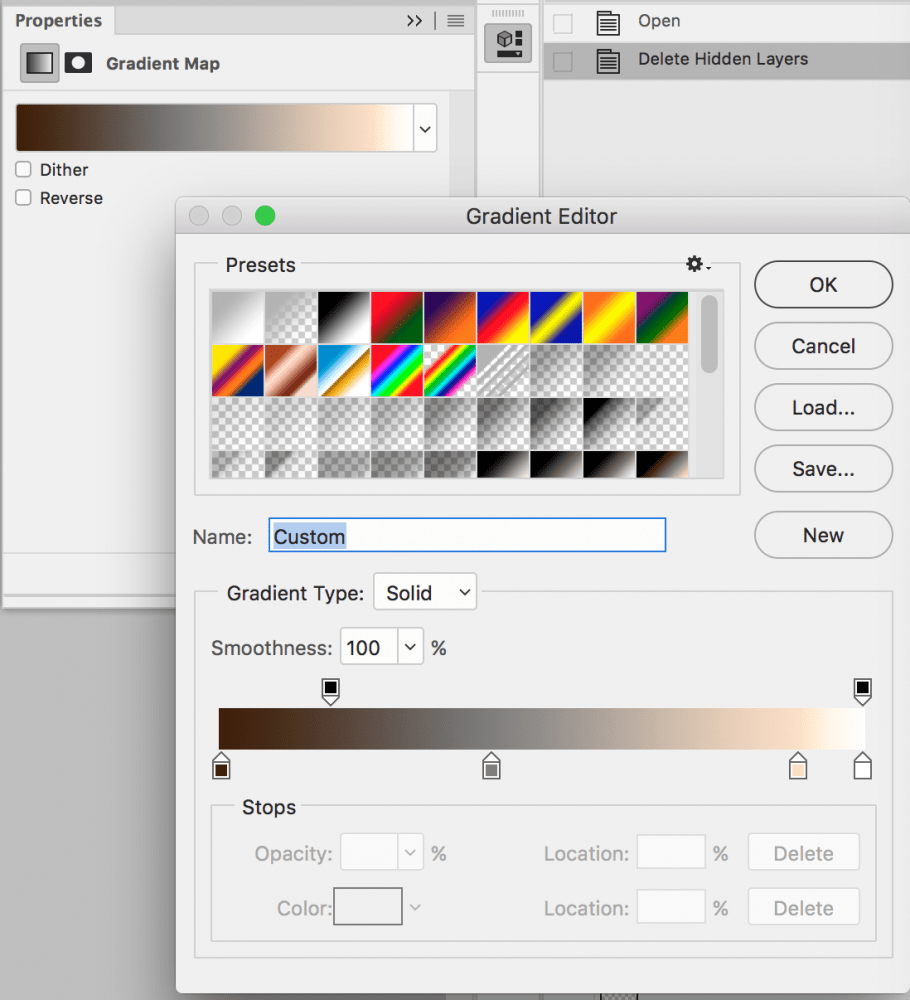
Gradient map for colouring. The darker tones on the left are applied to the shadows in the image, the creamier and lighter tones on the right are applied to the highlights. 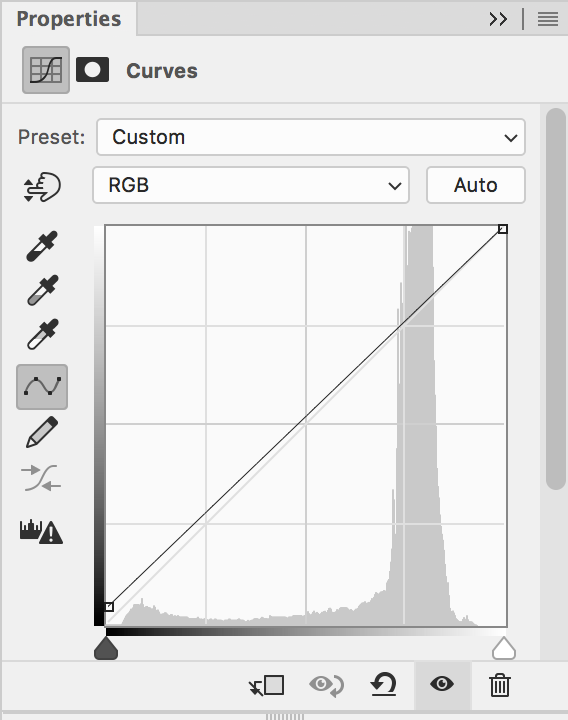
Curves layer for softening blacks – lifting the shadows to a dark grey instead of a pure black
Final Touches
I did another sweep through the image and added a few more details – some ripples in the water and a little colour to the lips to correlate with the flowers. After I finish an image I usually put it aside for a day or two and come back with fresh eyes to make sure I haven’t missed anything and then I call the image done.
I hope you’ve enjoyed this look behind the scenes at the shooting and editing process and it inspires you to go and create with whatever you have on hand!